Tutorial: Using World ID State Replication in a DApp
In this tutorial, we will build the DApp, asking the user to provide proof of personhood using the World App. So, having the Worldcoin issuer and state contract anchored on Ethereum, we can replicate its state to another chain, e.g., Avalanche, so that the proofs can be used in Avalanche DApp.
User flow
-
Firstly, the user will be asked to connect his Metamask wallet. After connecting the wallet, the user can go through the verification process.
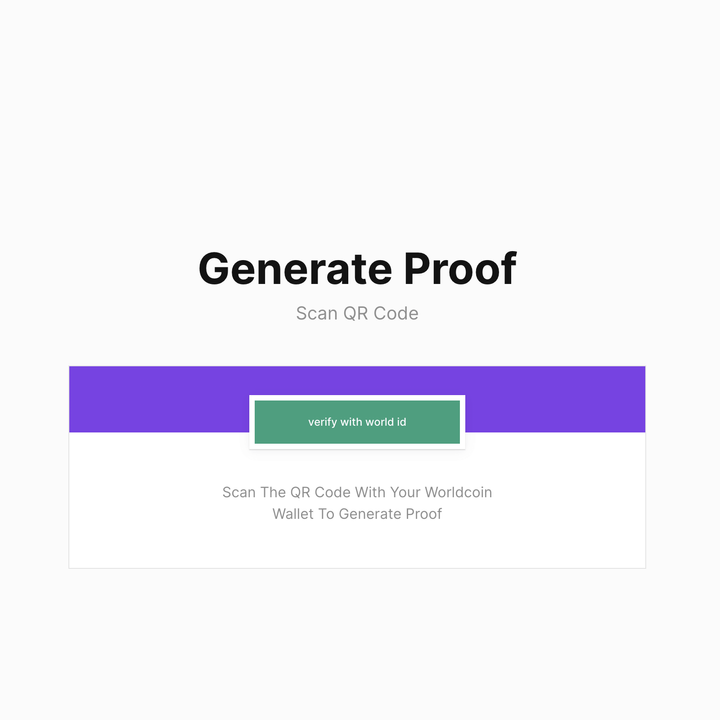
-
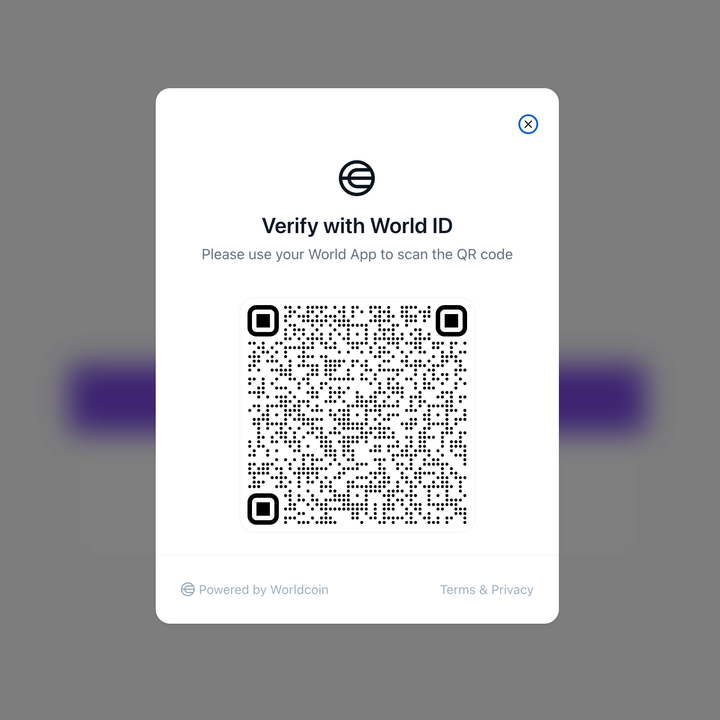
After clicking the button, a QR code is shown, and the user can scan it with his World App and generate proof that he is an actual human.
-
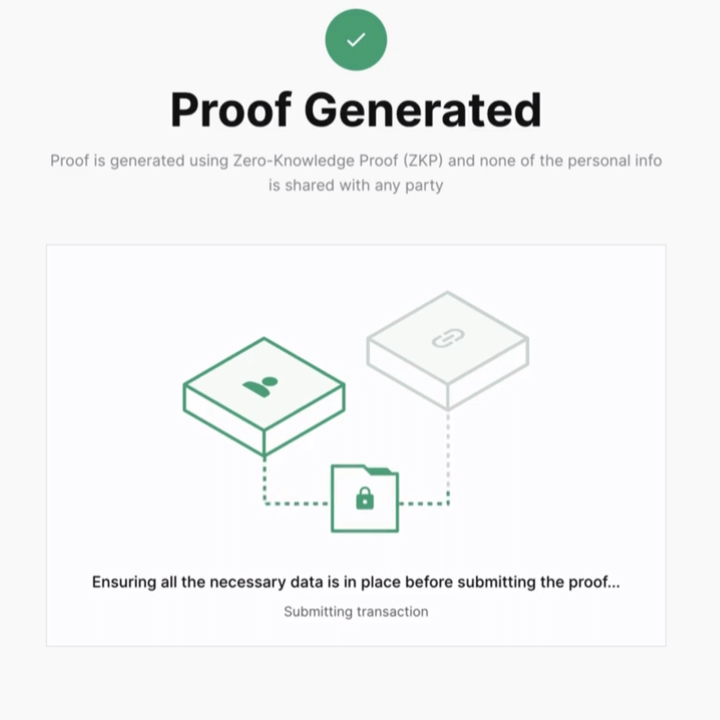
After successful proof generation, the relayer will be called to replicate the state from Ethereum to Avalanche.
-
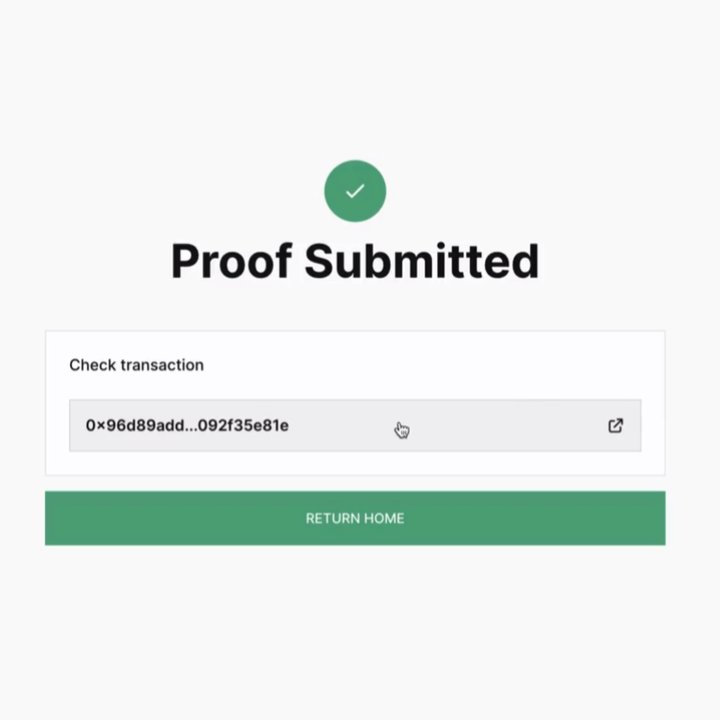
After proof is submitted, the user can review the correctness using the transaction hash
DApp creation
Our simple DApp will consist of 2 parts:
- front-end, which contains the QR-code for the World App, that contains a request for a proof of personhood;
- verifier smart contract;
Smart contracts
Let's start by writing a verifier contract verifying the user's proof of personhood.
We should also have the IdentityManager contract deployed on the destination chain, but that's the job of the Rarimo team.
Verifier
Verifier has two hooks, namely _beforeProofSubmit(...) and _afterProofSubmit(...), which are called before and after proof verification.
You can override them with the business logic you need.
Another contract will verify proofs – SemaphoreVerifier, that is fully forked from World ID, and we don't need to change it.
Verifier also uses Initializable from OpenZeppelin.
Here is the template for our Verifier contract:
pragma solidity 0.8.20;

import "@openzeppelin/contracts-upgradeable/proxy/utils/Initializable.sol";

import "./vendor/worldcoin/world-id-contracts/interfaces/ISemaphoreVerifier.sol";

import "./interfaces/IIdentityManager.sol";
import "./interfaces/IVerifier.sol";

contract Verifier is IVerifier, Initializable {
    address public semaphoreVerifier; // address of the SemaphoreVerifier contract, that will be called to verify ZKP
    address public identityManager; // address of the identity manager contract, deployed by the Rarimo team on the destination chain

    // contract initializer
    function __Verifier_init(
        address semaphoreVerifier_,
        address identityManager_
    ) external initializer {
        /* ... */
    }

    function verifyProof(
        uint256 root_,
        uint256 signalHash_,
        uint256 nullifierHash_,
        uint256 externalNullifierHash_,
        uint256[8] calldata proof_
    ) public virtual override {
        /* ... */
    }

    function _beforeProofValidation() internal virtual {}

    function _afterProofValidation() internal virtual {}
}
The provided functions are empty, so we need to fill them in:
__Verifier_init(...)– sets thesemaphoreVerifierandidentityManagervariables with the provided ones;verifyProof(...)– checks whether the provided root hasn't expired (hint: call identityManager isExpiredRoot(...) function), calls the proof verification function (SemaphoreVerifier verifyProof(...) function), and executes both hooks before and after proof verification respectively;_beforeProofValidation(...)– hook that should be executed before proof verification. You can extend it with your business logic. Usually, some security checks are performed here;_afterProofValidation(...)– hook that should be executed after proof verification. As the previous hook, it can contain any logic you want.
The filled version of the contract should look like this:
pragma solidity 0.8.20;

import "@openzeppelin/contracts-upgradeable/proxy/utils/Initializable.sol";

import "./vendor/worldcoin/world-id-contracts/interfaces/ISemaphoreVerifier.sol";

import "./interfaces/IIdentityManager.sol";
import "./interfaces/IVerifier.sol";

contract Verifier is IVerifier, Initializable {
    address public semaphoreVerifier;
    address public identityManager;

    function __Verifier_init(
        address semaphoreVerifier_,
        address identityManager_
    ) external initializer {
        semaphoreVerifier = semaphoreVerifier_;
        identityManager = identityManager_;
    }

    function verifyProof(
        uint256 root_,
        uint256 signalHash_,
        uint256 nullifierHash_,
        uint256 externalNullifierHash_,
        uint256[8] calldata proof_
    ) public virtual override {
        require(
            !IIdentityManager(identityManager).isExpiredRoot(root_),
            "Verifier: root is expired"
        );

        _beforeProofValidation();

        ISemaphoreVerifier(semaphoreVerifier).verifyProof(
            proof_,
            [root_, nullifierHash_, signalHash_, externalNullifierHash_]
        );

        _afterProofValidation();
    }

    function _beforeProofValidation() internal virtual {}

    function _afterProofValidation() internal virtual {}
}
We have yet to fill the hooks. We leave the implementation up to you.
For the full implementation, see Verifier.sol at the GitHub.
Deployment
You can deploy the recently created Verifier contract and SemaphoreVerifier by yourself.
Remember to set the semaphoreVerifier address in the Verifier contract.
Another option is to clone our GitHub repository, extend the contracts with your business logic and follow these steps:
-
After cloning, create the
.envfile, following the example provided in.env.example -
Fill in the
deploy/config/config.jsonfile. It has the following structure:deploy/config/config.json{
"signer": "0x0000000000000000000000000000000000000000",
"sourceStateContract": "0x0000000000000000000000000000000000000000",
"chainName": "CHAIN_NAME"
}Where
signeris the address of Rarimo TSS signer,sourceStateContractis the address of the World ID manager contract, andchainNameis the name of the network (e.g., Ethereum, Sepolia, Mumbai), where the contract is being deployed to. -
After finishing the configuration, execute:
npm run deploy-<network> -
To deploy the contracts locally, run the following commands (in the different terminals):
npm run private-network
npm run deploy-local -
The command to generate the bindings is:
npm run generate-types
Front-end
To create the front end, we will use the following stack of technologies:
- React
- Vite.js
- Distributed Lab web-kit
- js-crypto, js-jwz, js-iden3-core, jsonld-merklization, js-merkletree libraries from Iden3
- Yarn as a package manager
- World ID kit
We use World ID Kit, which provides rich and easy-to-use functionality and handles proof processing.
Namely, we will use the IDKitWidget component that will create the QR code, check the correctness of the proof, etc.
We should provide the following information to this widget:
signal– the signal to be included in the zero-knowledge proof. Typically used for on-chain actions;action– Identifier for the action the user is performing;onSuccess– Function to trigger when verification is successful, and the modal is closed. Should receive a single parameter of typeISuccessResult, which contains the proof details;app_id– unique identifier for the app verifying the action. This should be the App ID obtained from the Developer Portal;
You can provide other information as well. See WorldCoin Docs for more details.
Here is the part of the landing page with the IDKitWidget, which you can fill and use on your page:
import { PROVIDERS } from '@distributedlab/w3p'
import { IDKitWidget } from '@worldcoin/idkit'
import { AppButton } from '@/common'

/* ... */
    <div className='auth-proof__card-qr-wrp'>
    {provider?.isConnected ? (
        <IDKitWidget
        signal={provider.address} // the signal we will include is the user's metamask address
        action='your-action'
        onSuccess={handleZkProofGen} // handle function that redirects the user in case of a valid proof in our case
        app_id={your-app-id}
        >
        {({ open }) => (
            <AppButton
            className='auth-proof__card-btn'
            text={'verify with world id'}
            onClick={open}
            />
        )}
        </IDKitWidget>
    ) : (
        <>
        <AppButton
            className='auth-proof__connect-btn'
            text={'CONNECT METAMASK'}
            onClick={connectProvider}
        >
            {`Connect Wallet`}
        </AppButton>
        </>
    )}
    </div>
Let's add a few more details so the page will display the first two steps of our flow. The final code may look like this:
import './styles.scss'

import { config } from '@config'
import { PROVIDERS } from '@distributedlab/w3p'
import { IDKitWidget } from '@worldcoin/idkit'
import { FC, HTMLAttributes, useCallback } from 'react'

import { AppButton, Loader } from '@/common'
import { useWeb3Context, useZkpContext } from '@/contexts'
import { ErrorHandler } from '@/helpers'

type Props = HTMLAttributes<HTMLDivElement>

const AuthProof: FC<Props> = () => {
  const { isPending, handleZkProofGen } = useZkpContext()

  const { provider, init } = useWeb3Context()

  const connectProvider = useCallback(async () => {
    try {
      await init(PROVIDERS.Metamask)
    } catch (error) {
      ErrorHandler.process(error)
    }
  }, [init])

  return (
    <div className='auth-proof'>
      {isPending ? (
        <>
          <div className='auth-proof__header'>
            <h2 className='auth-proof__header-title'>{`Check Transition states`}</h2>
            <span className='auth-proof__header-subtitle'>{`Please wait...`}</span>
          </div>

          <div className='auth-proof__loader-wrp'>
            <Loader className='auth-proof__loader' />
          </div>
        </>
      ) : (
        <>
          <div className='auth-proof__header'>
            <h2 className='auth-proof__header-title'>{`Generate Proof`}</h2>
            <span className='auth-proof__header-subtitle'>{`Scan QR Code`}</span>
          </div>

          <div className='auth-proof__card'>
            <div className='auth-proof__card-header'>
              <div className='auth-proof__card-qr-wrp'>
                {provider?.isConnected ? (
                  <IDKitWidget
                    signal={provider.address}
                    action='your-action'
                    onSuccess={handleZkProofGen}
                    app_id={config.WORLDCOIN_APP_ID}
                  >
                    {({ open }) => (
                      <AppButton
                        className='auth-proof__card-btn'
                        text={'verify with world id'}
                        onClick={open}
                      />
                    )}
                  </IDKitWidget>
                ) : (
                  <>
                    <AppButton
                      className='auth-proof__connect-btn'
                      text={'CONNECT METAMASK'}
                      onClick={connectProvider}
                    >
                      {`Connect Wallet`}
                    </AppButton>
                  </>
                )}
              </div>
            </div>
            <div className='auth-proof__card-body'>
              <div className='auth-proof__card-title'>
                {`Scan the QR code with your Worldcoin wallet to generate proof`}
              </div>
            </div>
          </div>
        </>
      )}
    </div>
  )
}

export default AuthProof
QR code contains the request to generate the proof in the user's World App. After receiving the proof, we want to submit it on-chain. To do that, transaction body should be filled with the following:
- issuer state root, for which the proof is created;
- hash of the user's address, which we provided as a signal;
- nullifier hash, which is stored in the ZKP that we generated;
- external nullifier hash, which is the packed hash of
app_idandaction; - unpacked proof;
Let's define such a function:
const submitZkp = useCallback(async () => {
    setIsSubmitting(true)

    try {
      if (!zkProof) throw new TypeError('ZKP is not defined')

      if (!provider?.address) throw new TypeError('Provider is not defined')

      const hashToField = (value: string) => {
      }

      const externalNullifierHash = hashToField(
        utils.solidityPack(
          ['uint256', 'string'],
          [
            hashToField(
              utils.solidityPack(['string'], [config.WORLDCOIN_APP_ID]),
            ).toHexString(),
            'your-action',
          ],
        ),
      )

      const unpackedProof = utils.defaultAbiCoder.decode(
        ['uint256[8]'],
        zkProof.proof,
      )[0]

      const txBody = getProveIdentityTxBody(
        zkProof.merkle_root,
        hashToField(provider.address).toHexString(),
        zkProof.nullifier_hash,
        externalNullifierHash.toHexString(),
        unpackedProof.map((el: unknown) => BigNumber.from(el).toHexString()),
      )

      const tx = await provider?.signAndSendTx?.({
        to: config?.[
          `QUERY_VERIFIER_CONTRACT_ADDRESS_${selectedChainToPublish}`
        ],
        ...txBody,
      })

      verificationSuccessTx.set((tx as EthTransactionResponse).transactionHash)

      navigate(RoutesPaths.authSuccess)
    } catch (error) {
      ErrorHandler.process(error)
    }

    setIsSubmitting(false)
  }, [
    zkProof,
    getProveIdentityTxBody,
    navigate,
    provider,
    selectedChainToPublish,
    verificationSuccessTx,
  ])
Finally, after the transaction has been added to the block, we will show its hash to the user using the following code:
    <div className='auth-success'>
      <div className='auth-success__header'>
        <div className='auth-success__header-icon-wrp'>
          <Icon className='auth-success__header-icon' name={ICON_NAMES.check} />
        </div>
        <h2 className='auth-success__header-title'>{`Proof Submitted`}</h2>
      </div>

      <div className='auth-success__card'>
        <span className='auth-success__card-title'>{`Check transaction`}</span>

        <a
          className='auth-success__copy-field-wrp'
          href={provider?.getTxUrl?.(
            config.SUPPORTED_CHAINS_DETAILS[config.DEFAULT_CHAIN],
            verificationSuccessTx.get,
          )}
          target='_blank'
          rel='noreferrer'
        >
          <span className='auth-success__copy-field'>
            {abbrCenter(verificationSuccessTx.get, 10)}
            <Icon
              className='auth-success__copy-field-icon'
              name={ICON_NAMES.externalLink}
            />
          </span>
        </a>
      </div>
        <AppButton
        className='auth-success__return-btn'
        routePath={'/'}
        text={`RETURN HOME`}
        size={`large`}
      />
    </div>
At this point, the user has passed the verification, and you can be sure that this is a real person and not a bot.
If you want to tweak or expand this example, we recommend you clone front-end and smart contracts from the GitHub, make the changes you need and use it further.