Guide: How to set up a credentials issuer
This article details the steps to set up a Credentials Issuer, create your credentials schema, and issue the first credentials.
Installation
Firstly, you will need to install Docker via the provided link. Running the app with Docker allows for minimal installation and a quick setup. Then, you will need to clone the repository or download it manually.
git clone -b v1.0.0 https://github.com/rarimo/issuer-node.git
After cloning the repository, you should do the following:
-
Generate an Ethereum keypair for the Issuer Node. It will be used to sign state transitions on the Rarimo chain.
noteCurrently, there is no network fee for the state transition transactions. To prevent network abuse, we maintain an allowlist of identity issuers. Contact us in Discord and provide the corresponding Ethereum address to get added to the allowlist.
-
In the folder you've cloned rename
.env-api.exampleto.env-api,.env-ui.exampleto.env-uiand.env-issuer.exampleto.env-issuer..env-apiis used to configure the api-ui. This file allows the user to configure the basic auth of the api-ui, the server URL, and others..env-uiis used to configure the api-ui. This file allows the user to configure the basic auth of the Issuer UI, the server URL, and others..env-issueris used to configure the api-issuer. It contains the needed configuration to start the node, such as the infrastructure configuration (postgres/redis/vault), the blockchain variables to be able to publish the state, the Basic Auth variables, and other variables.
-
In the
.env-issuerfile, you need to set the variableISSUER_ETHEREUM_URLto a Rarimo RPC endpoint.
- Run
sudo make buildin the cloned folder - Run
sudo make private_key=YOUR_ETHEREUM_PRIVATE_KEY run-allwith the issuer's private key. - Check that
localhost:3001(Issuer API) andlocalhost:3002(Issuer UI) are available.
How to create credential schemas
If you need to create your own Credentials Schemas (some of the schemas can be found here) you can use either Polygon ID Schema Builder (recommended option) or you can write it by yourself and import it, using Issuer UI API.
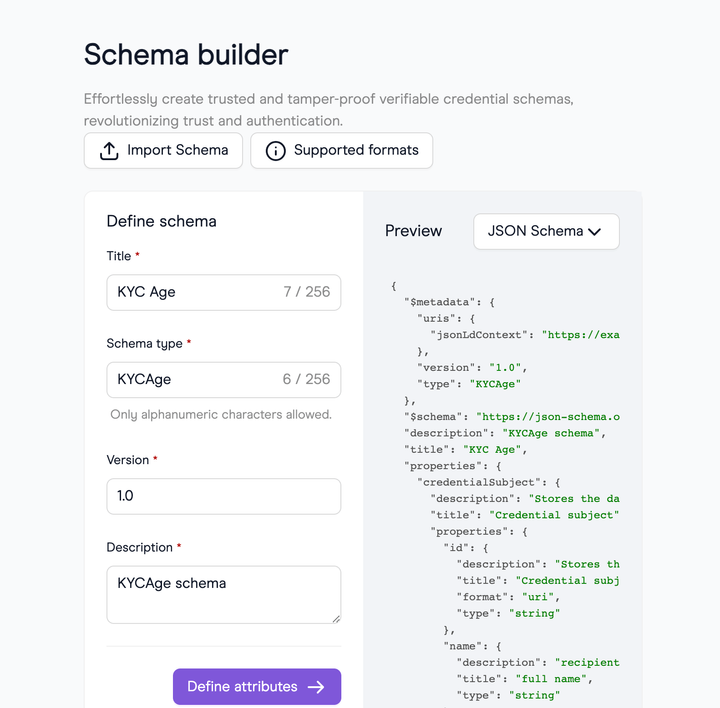
Creating a schema with Polygon ID Schema Builder
To create the schema using Polygon ID Builder, follow these steps:
- Enter the title, type, version, and description of your schema
- Define the attributes. Let's add the date of birth and the full name for this example.
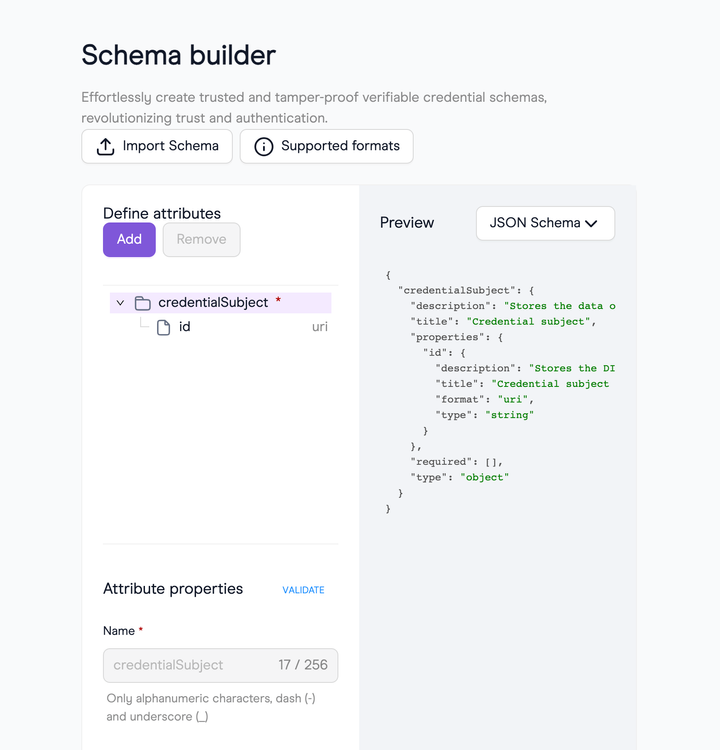
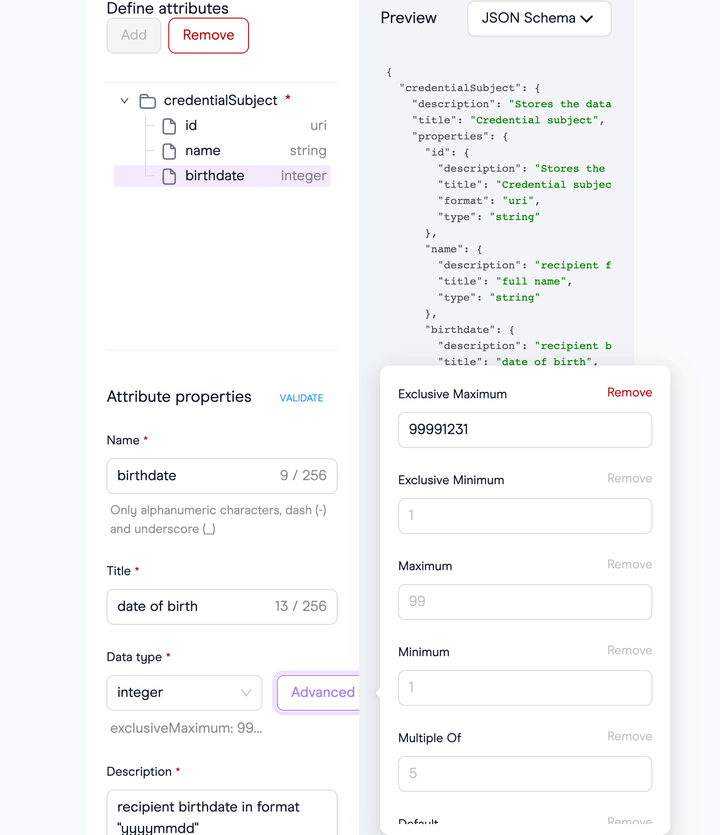
- After clicking on Add button, a new attribute will appear, and you need to change its name, title, type, and description and set the checkbox, whether it is required or not

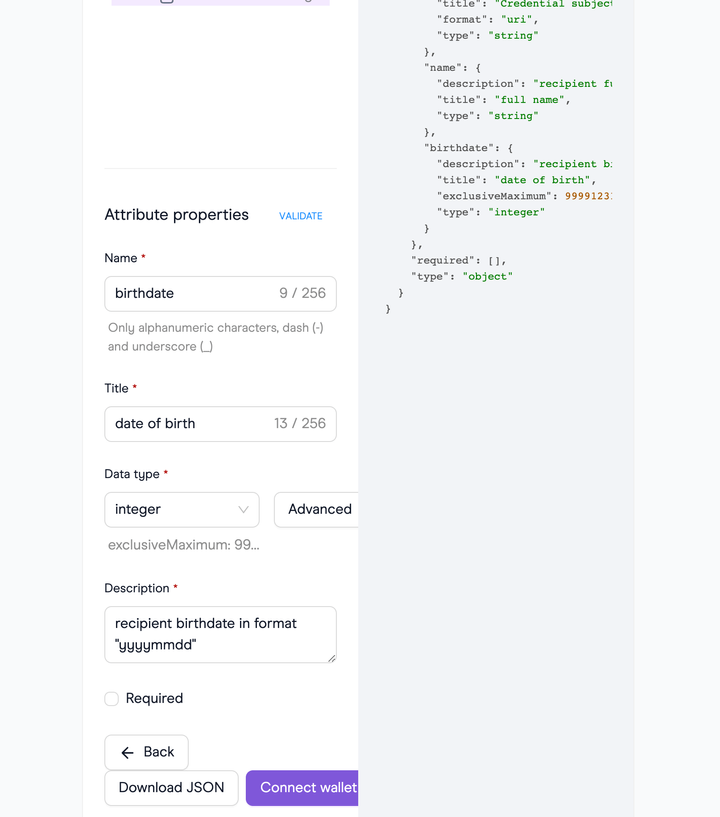
- You can also set additional restrictions by clicking on the Advanced button
- After you've finished, you can copy it from the right window or download it by pressing on the Download JSON button below the properties
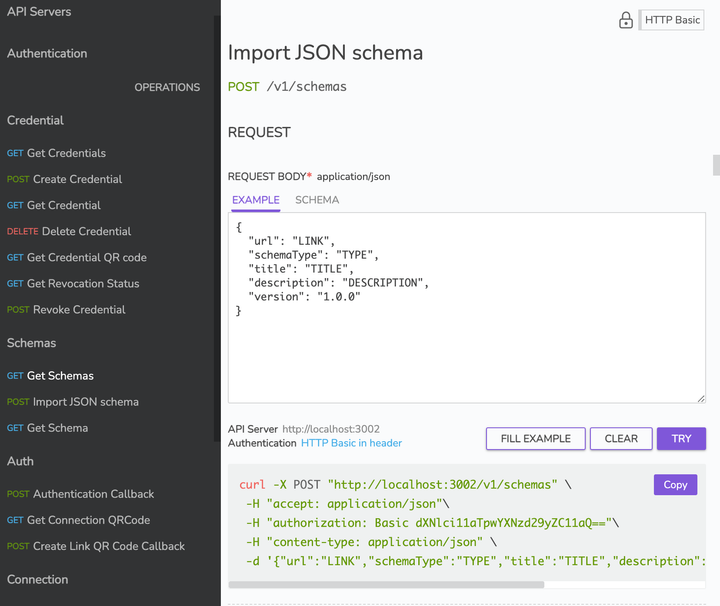
- Publish it somewhere (e.g., on GitHub or IPFS) and paste the link into url field at the Import JSON schema in the Issuer UI API.
You should also copy the type, title, description, and version from the posted schema
Issuing credentials
Once the issuer is ready, we can issue our first credentials.
Using the issuer UI
- The Issuer is also an identity, so we need to create one.
To do that, open
localhost:3001and select Create Identity in the left sidebar.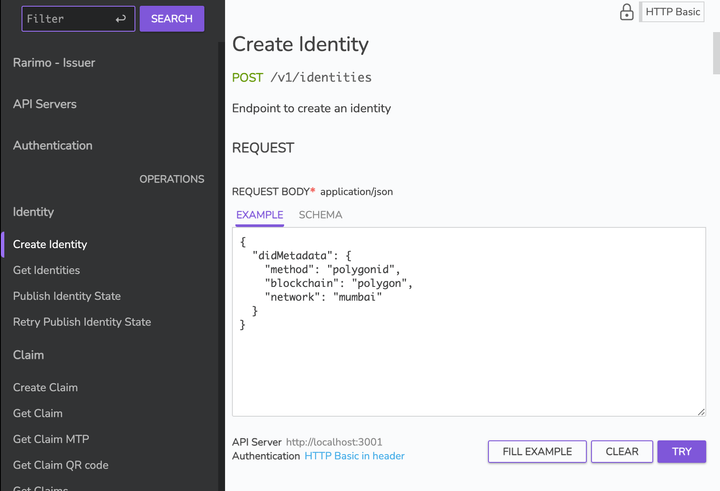
- Fill in the method, blockchain, and network fields.
The method field is required.
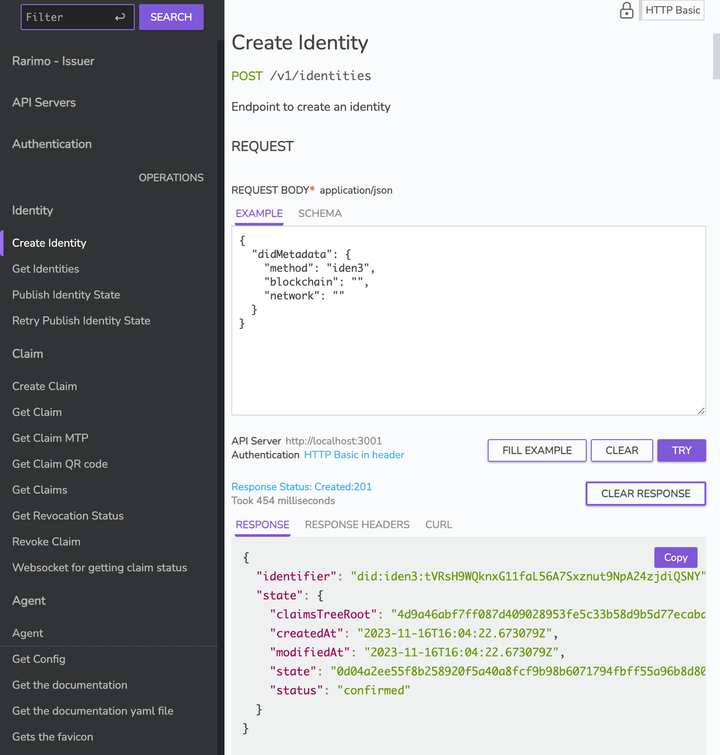
We will use the method iden3 without specifying blockchain and network.
We will also create an identity for the user so we can issue credentials to him.
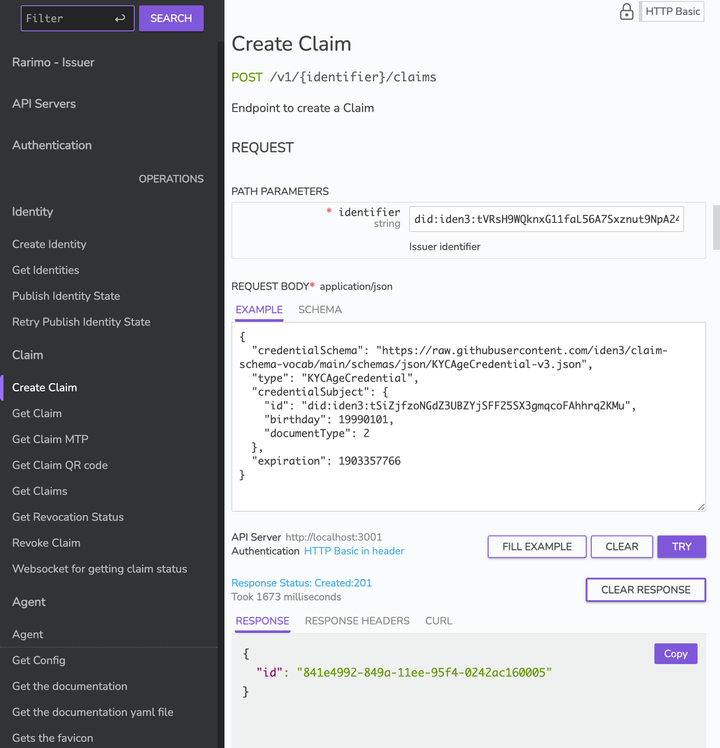
- We can issue our first claim after creating both identities (or receiving the user's identity from him).
To do that, press the Create Claim button and paste the Issuer identifier (our first generated ID) and user's ID in the id field below:
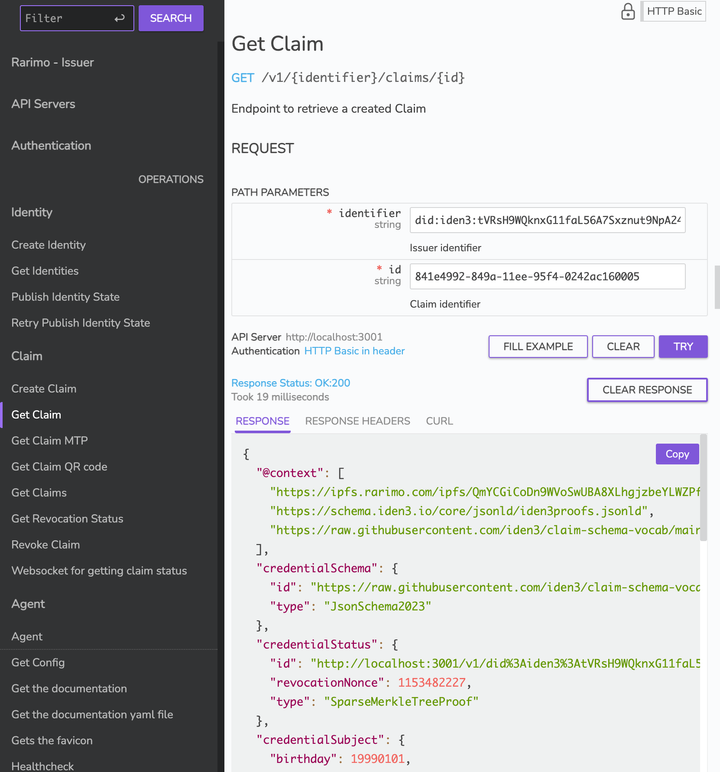
- We can check our claim using the Get Claim endpoint:
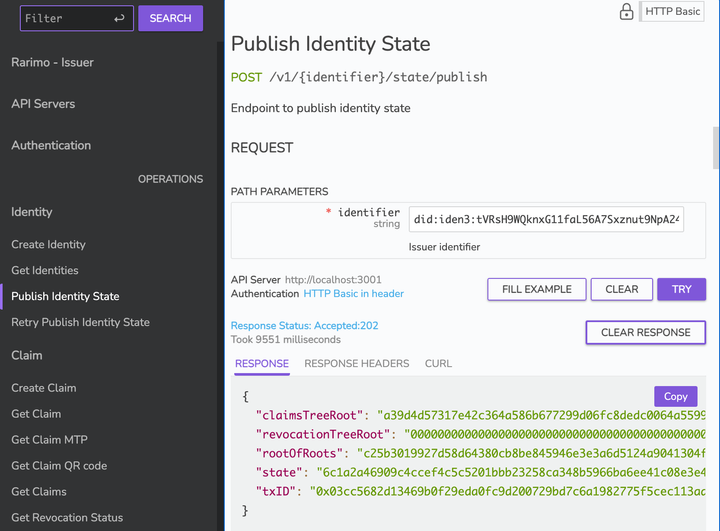
- The last thing we need to do is publish the state of our issuer on-chain
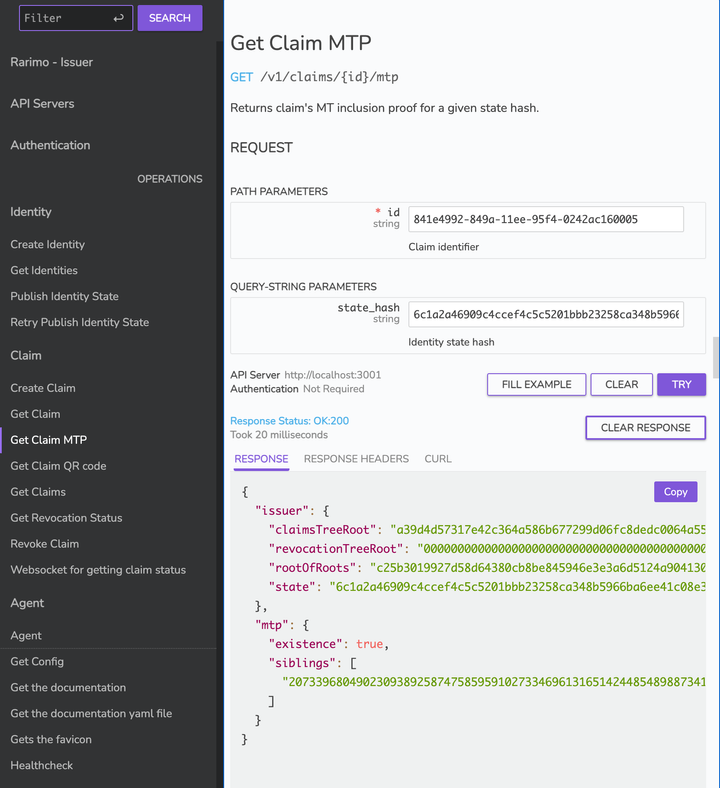
- Now, we can send to the user MTP of Claim inclusion in the tree, using Get Claim MTP
Issuing via API
API documentation can be found in apy.yaml.
Follow these steps:
-
Let's issue credentials to the previously created identity:
- the
authorizationfield is Base64 encoded username and password - we will change the
id(receiver's did),birthdayandexpirationfields
curl -X POST "http://localhost:3002/v1/credentials" \
-H "accept: application/json"\
-H "authorization: Basic dXNlci1hcGk6cGFzc3dvcmQtYXBp"\
-H "content-type: application/json" \
-d '{
    "credentialSchema": "https://raw.githubusercontent.com/iden3/claim-schema-vocab/main/schemas/json/KYCAgeCredential-v3.json",
    "type": "KYCAgeCredential",
    "credentialSubject":{
        "id":"did:iden3:tQdm5KtrBAsQApF5445Wo4p8f1D5QKmAEpKWSxQaG",
        "birthday": 20000101,
        "documentType": 2
        },
    "expiration": "2023-10-27T10:56:42.618Z",
    "signatureProof": true,
    "mtProof": true }'
The response would be the credentials ID:
{
    "id": "b326c436-6f58-11ee-8dab-0242ac120007"
} - the
-
After credentials are issued, we can publish our issuer's identity state on-chain:
curl -X POST "http://localhost:3002/v1/state/publish" \
-H "accept: application/json"\
-H "authorization: Basic dXNlci1hcGk6cGFzc3dvcmQtYXBp"
The response would be the new state, new tree roots and the txID:
{
  "claimsTreeRoot": "c8d09a3e4fc89ce6407ac96ea6e007b68cdd2e853b945c5f9baf70af3faf0510",
  "revocationTreeRoot": "0000000000000000000000000000000000000000000000000000000000000000",
  "rootOfRoots": "2c2db5c1ef764b48ca0cdf186208f7de940114b1c42061a89d3851beeb956c28",
  "state": "6f511e29380a28bb47cbc628ae6b20a1df2169c3cfec46fef07bc5c7ab3e6819",
  "txID": "0xbde3732071c9947d43a46175e47b6604b924e273ce86898f76ff621b6e48691b"
} -
Finally, we can make a request to the Issuer API and check that credentials exist in the tree and also receive the MTP of existence:
 curl -X GET "http://localhost:3001/v1/claims/b326c436-6f58-11ee-8dab-0242ac120007/mtp" \
 -H "accept: application/json"
The response would be the information about the issuer and MTP (of existence in our case):
{
  "issuer": {
    "claimTreeRoot": "c8d09a3e4fc89ce6407ac96ea6e007b68cdd2e853b945c5f9baf70af3faf0510",
    "revocationTreeRoot": "0000000000000000000000000000000000000000000000000000000000000000",
    "rootOfRoots": "2c2db5c1ef764b48ca0cdf186208f7de940114b1c42061a89d3851beeb956c28",
    "state": "6f511e29380a28bb47cbc628ae6b20a1df2169c3cfec46fef07bc5c7ab3e6819"
  },
  "mtp": {
    "existence": true,
    "siblings": [
      "10737733873451827385669539393513485246847702080273815461038732999844382514192"
    ]
  }
}